> For the complete documentation index, see [llms.txt](https://help.pesipiuma.app/llms.txt). Markdown versions of documentation pages are available by appending `.md` to page URLs; this page is available as [Markdown](https://help.pesipiuma.app/en/using-pesipiuma/using-the-importers/optitex-pds.md).
# Optitex - PDS
Use the importer for Optitex PDS (Pattern Design Software)
## Using the Optitex PDS importer
## 1. Prepare the files using Optitex PDS
### Exporting a file with a single size
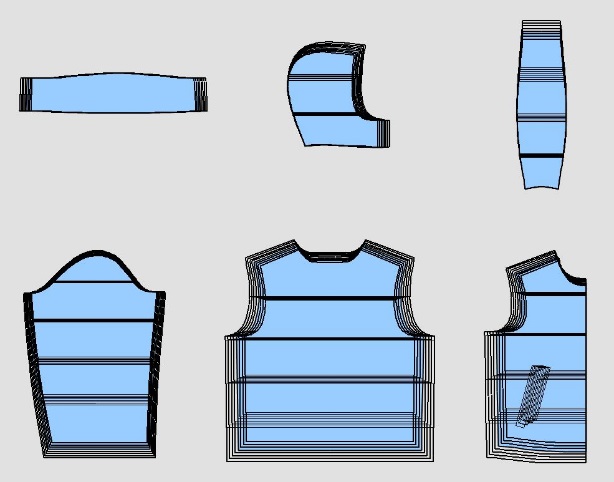
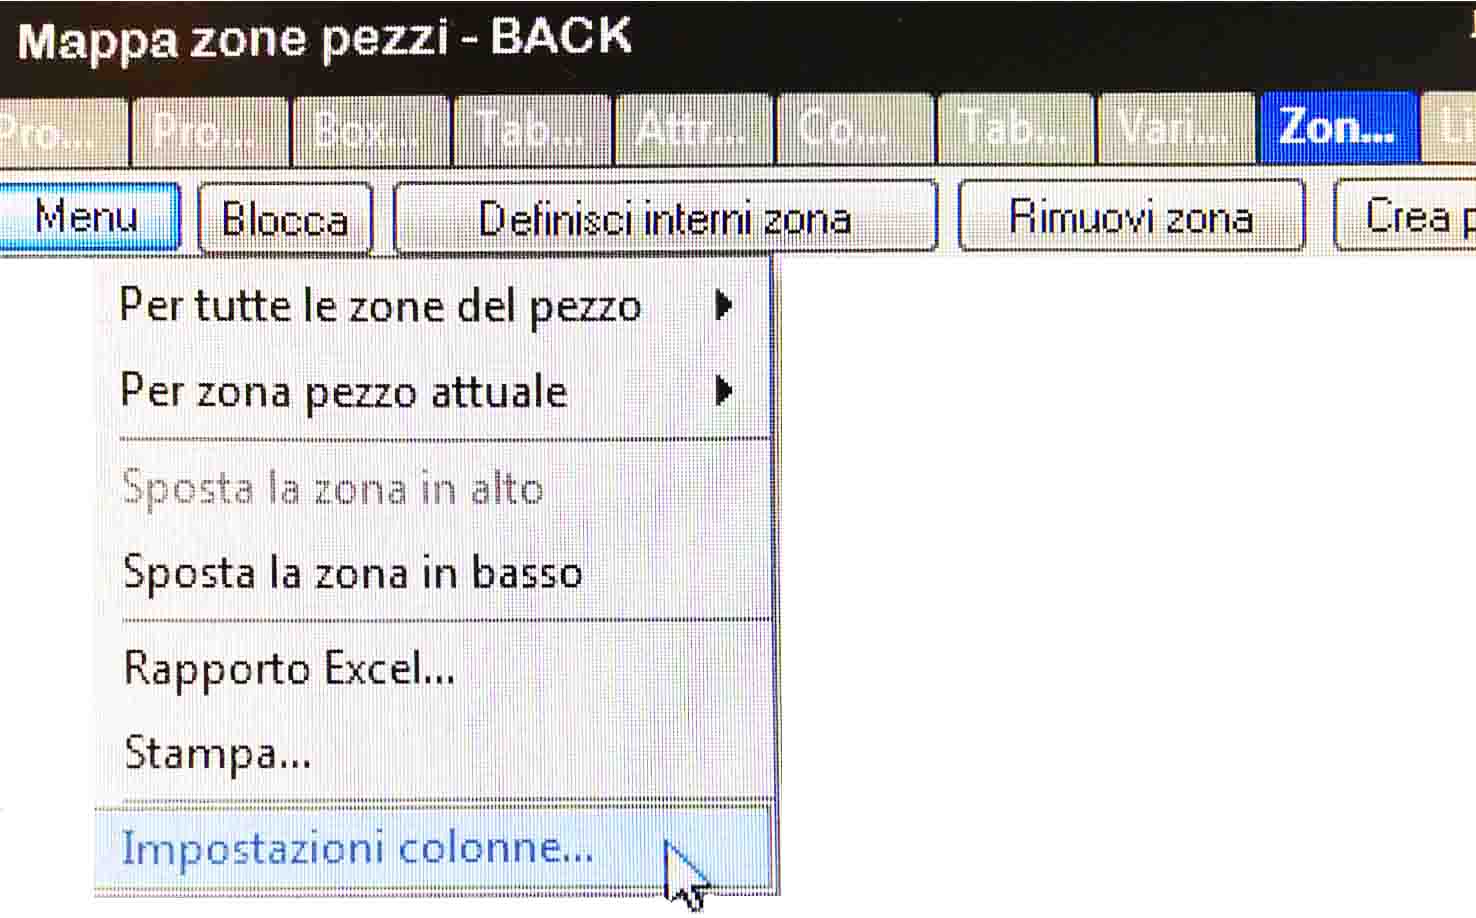
* Prepare the pieces for which the weight will be calculated with the related sections defined and possibly graded.\ 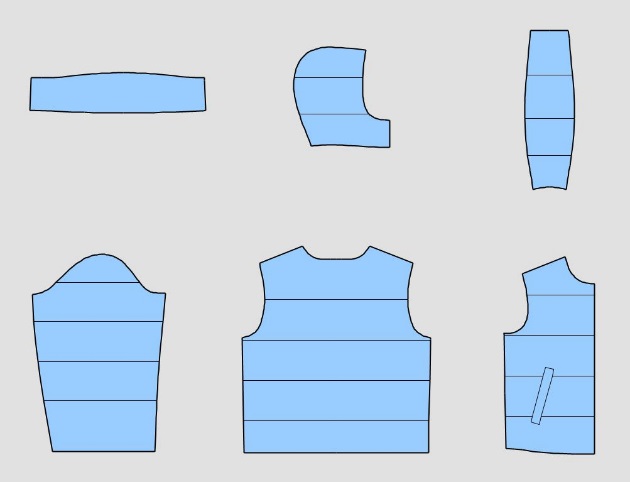 * On the **Zones** sheet select the *Menu* button and choose **Column Settings**.\
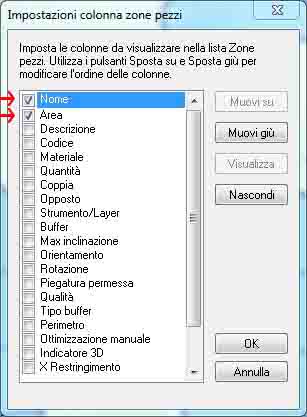
  * In the **Piece Zones Column Settings** window keep only **Name** and **Area** selected in the order shown.\
  * Using **Trace Zones** or **Build Zones**, detect the padded areas starting from the bottom and, if there are side by side sections, from left to right.
* The area values are displayed in the dedicated window in the order they were detected.\
* Using **Trace Zones** or **Build Zones**, detect the padded areas starting from the bottom and, if there are side by side sections, from left to right.
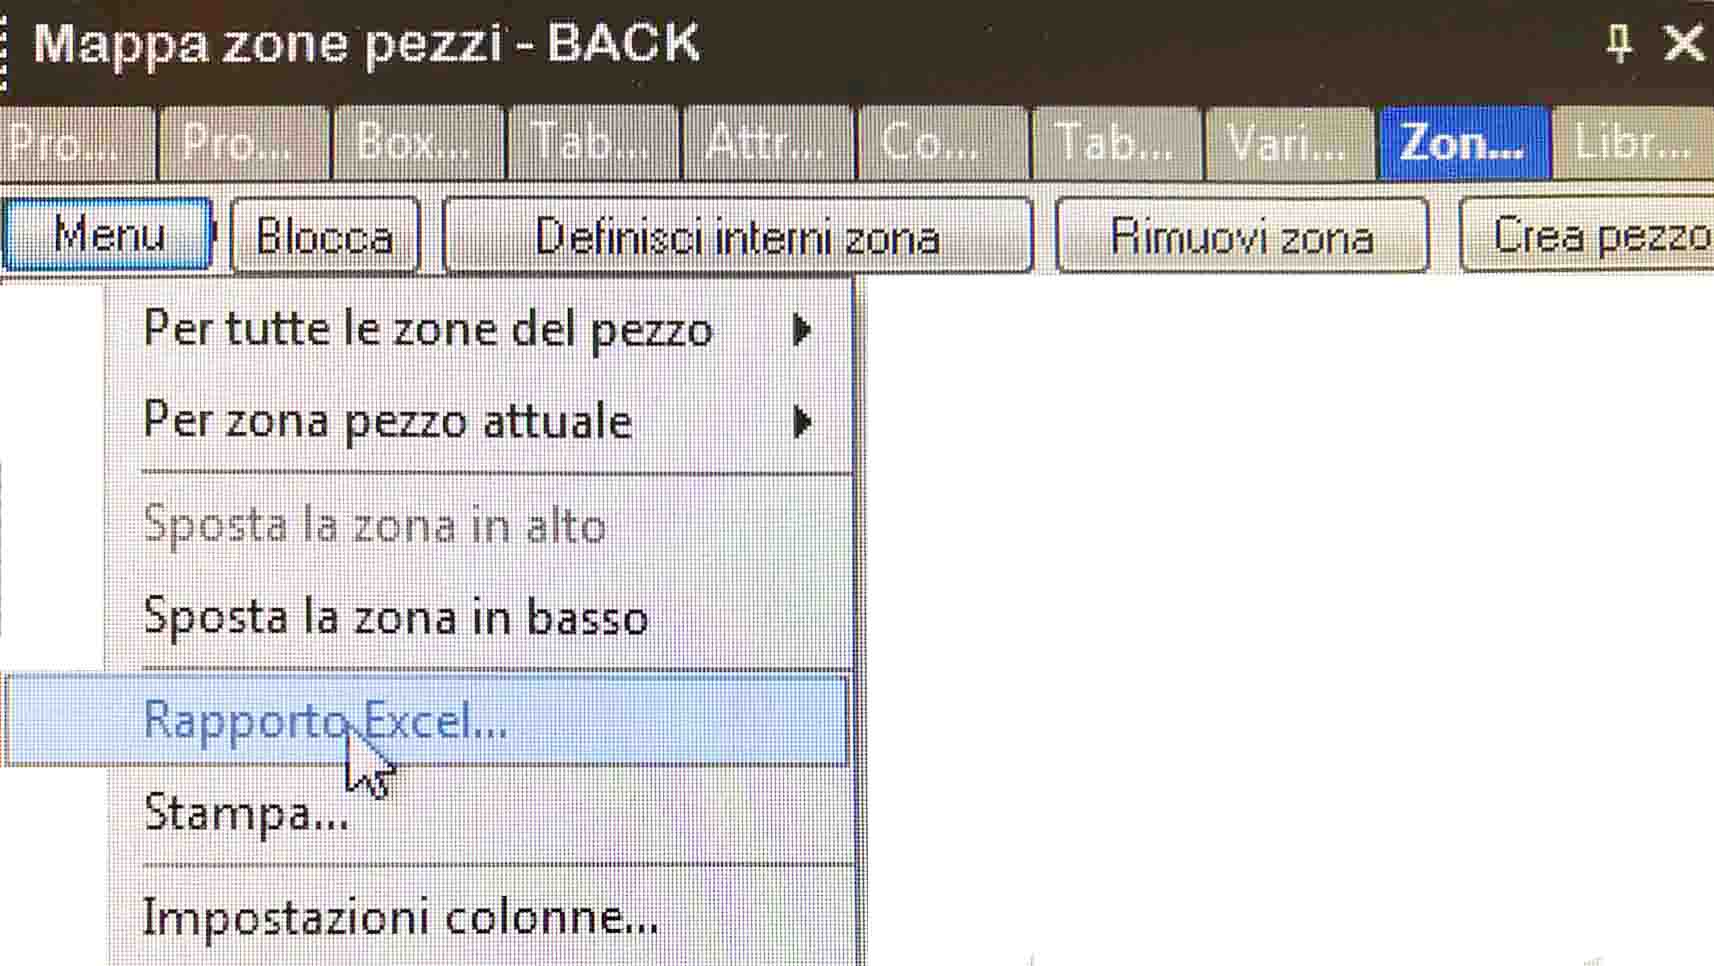
* The area values are displayed in the dedicated window in the order they were detected.\ 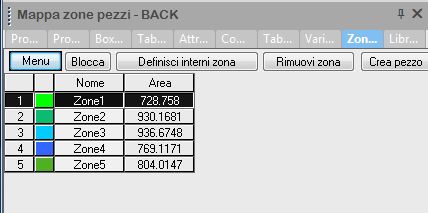 * On the **Zones** sheet select the *Menu* button and choose **Excel Report**.\
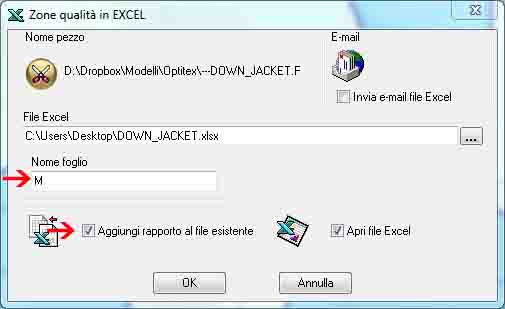
  * In the next window set the file save path, check **Add report to existing file** and in **Sheet Name** enter the active size name then confirm.\
  The file is now ready to be imported into **Pesipiuma**.
### Exporting a file with multiple sizes
If the model is graded and you need to export files for all the sizes:
1. On the CAD detect and export to Excel the areas for the Base Size (e.g. **M**) using the procedure described above.
2. From the CAD menu bar select **Grading** then **Size Table**.\
The file is now ready to be imported into **Pesipiuma**.
### Exporting a file with multiple sizes
If the model is graded and you need to export files for all the sizes:
1. On the CAD detect and export to Excel the areas for the Base Size (e.g. **M**) using the procedure described above.
2. From the CAD menu bar select **Grading** then **Size Table**.\ 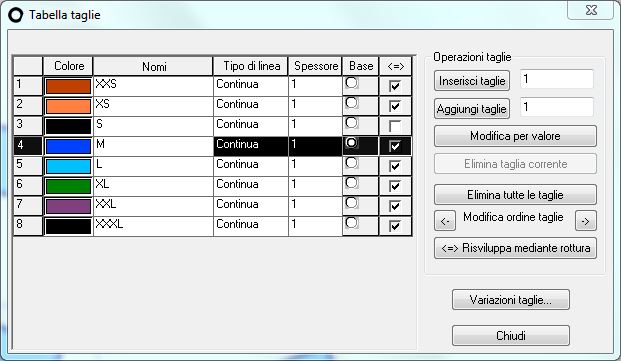 3. Move the base size from M to S: the area data are automatically updated.
4. On the **Zones** sheet select the *Menu* button then **Excel Report** and in **Sheet Name** enter the new size **S** ensuring that **Add report to existing file** is checked, then confirm.\
3. Move the base size from M to S: the area data are automatically updated.
4. On the **Zones** sheet select the *Menu* button then **Excel Report** and in **Sheet Name** enter the new size **S** ensuring that **Add report to existing file** is checked, then confirm.\ 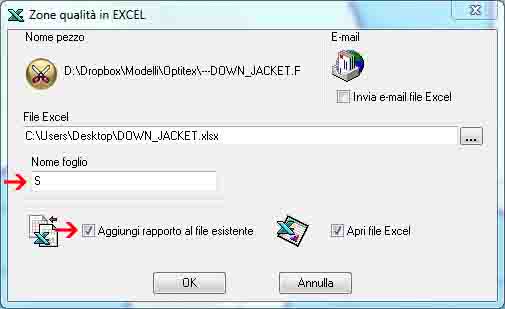 5. Repeat steps **1, 2 and 3** for every required size.
At the end of the process the Excel file will contain as many sheets as the exported sizes.\
5. Repeat steps **1, 2 and 3** for every required size.
At the end of the process the Excel file will contain as many sheets as the exported sizes.\ 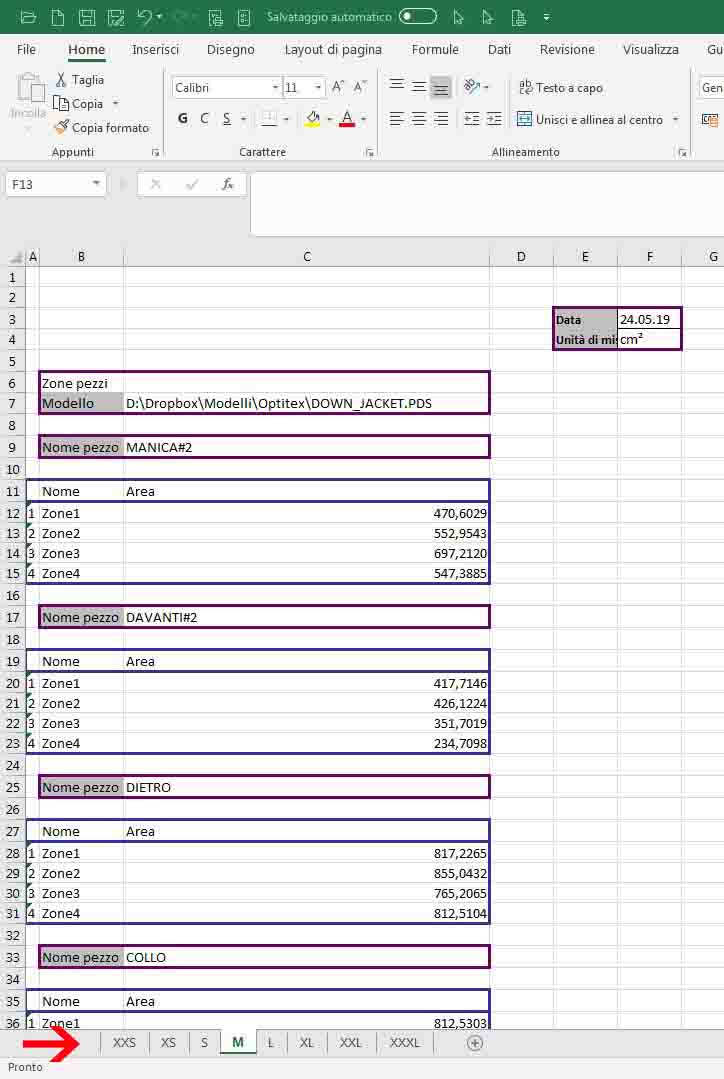 Proceed with the next step: **Import the files generated by Optitex PDS**
## 2. Import the files generated by Optitex PDS into Pesipiuma
{% hint style="info" %}
The active importers in the workspace are the ones included in the subscribed plan. If you need to add **Optitex**, contact support; for Business or Enterprise plans, contact your system administrator.
{% endhint %}
1. Open the project [Editor](/en/using-pesipiuma/introduction/report-editor.md).
2. Click **Import Excel** for an empty project, or **Replace Excel** for an existing Excel project.
3. In the **Excel files** area, select **Optitex v1** from the importer menu.
4. Drop the Optitex workbook into the upload area or click to select it.
5. Optionally add a report image in the **Image** area.
6. Click **Preview**.
7. In the **Excel Preview**, check the size preview and select the base size.
8. Click **Confirm** in the preview.
9. Click **Import**.
The Optitex importer expects one workbook. Supported formats are **.xls** and **.xlsx**. Each populated workbook sheet is imported as one size.
After import, Pesipiuma creates the sizes, pieces, and sections in the editor. The default coefficient is `100`, quantities are read from the piece names when present, and rounding defaults to the tenth of a gram.
At this point you can [edit](/en/using-pesipiuma/preliminary-operations/manage-pieces.md#edit-a-piece) quantities, coefficients, section notes, and rounding if needed.
For Excel reports, add or replace the [report image](/en/using-pesipiuma/create-a-report/upload-an-image.md) and [position the labels](/en/using-pesipiuma/create-a-report/place-report-labels.md) before opening the report.
### Update the area values
To update the area values for an existing Optitex Excel project, use **Replace Excel** and import the updated workbook.
{% hint style="danger" %}
Replacing Excel data rebuilds the sizes, pieces, sections, and initial label positions from the new workbook. Check the report image and label positions before opening the report.
{% endhint %}
{% hint style="warning" %}
An Excel project cannot be switched to DXF import. Create a new project if you need to use DXF/RUL files instead.
{% endhint %}
Proceed with the next step: **Import the files generated by Optitex PDS**
## 2. Import the files generated by Optitex PDS into Pesipiuma
{% hint style="info" %}
The active importers in the workspace are the ones included in the subscribed plan. If you need to add **Optitex**, contact support; for Business or Enterprise plans, contact your system administrator.
{% endhint %}
1. Open the project [Editor](/en/using-pesipiuma/introduction/report-editor.md).
2. Click **Import Excel** for an empty project, or **Replace Excel** for an existing Excel project.
3. In the **Excel files** area, select **Optitex v1** from the importer menu.
4. Drop the Optitex workbook into the upload area or click to select it.
5. Optionally add a report image in the **Image** area.
6. Click **Preview**.
7. In the **Excel Preview**, check the size preview and select the base size.
8. Click **Confirm** in the preview.
9. Click **Import**.
The Optitex importer expects one workbook. Supported formats are **.xls** and **.xlsx**. Each populated workbook sheet is imported as one size.
After import, Pesipiuma creates the sizes, pieces, and sections in the editor. The default coefficient is `100`, quantities are read from the piece names when present, and rounding defaults to the tenth of a gram.
At this point you can [edit](/en/using-pesipiuma/preliminary-operations/manage-pieces.md#edit-a-piece) quantities, coefficients, section notes, and rounding if needed.
For Excel reports, add or replace the [report image](/en/using-pesipiuma/create-a-report/upload-an-image.md) and [position the labels](/en/using-pesipiuma/create-a-report/place-report-labels.md) before opening the report.
### Update the area values
To update the area values for an existing Optitex Excel project, use **Replace Excel** and import the updated workbook.
{% hint style="danger" %}
Replacing Excel data rebuilds the sizes, pieces, sections, and initial label positions from the new workbook. Check the report image and label positions before opening the report.
{% endhint %}
{% hint style="warning" %}
An Excel project cannot be switched to DXF import. Create a new project if you need to use DXF/RUL files instead.
{% endhint %}